26 Oct 2016

Five practical reasons why Muckster boots are the best (imho)

Disclosure - the boots in this review were gifted to me by the Muck Boot company for review. As ever, my reviews are an honest reflection of my opinions and experience of the product.

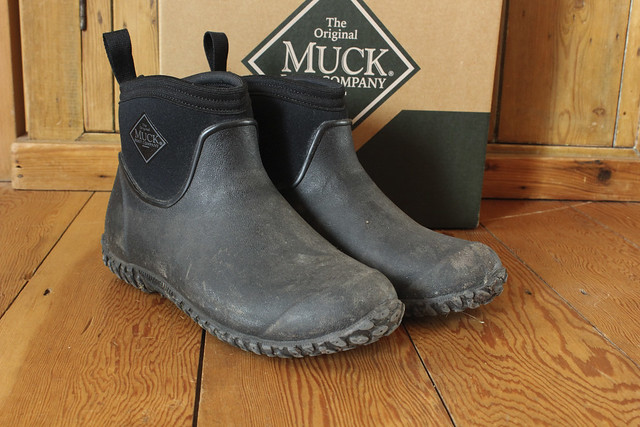
A good pair of wellies (rubber boots) can fulfil many functions - for dancing at a summer festival, running through the rain or, like Meghan Markle, stylish footwear for welly wanging in New Zealand! As a gardener, my needs are more practical. In all these cases, Muck Boots could fit the bill. Here's why.


Muck Boots


Earlier this year I was sent a pair of wellies to try out.  Naturally, as a gardener, this was a thrilling prospect as my old and very loved pair had been pushed into service one season too many and had cracked along the seam where my foot bends, allowing the elements access to my socks.  Nothing worse than wet socks on a cold day, even if the ancient but beloved wellies had a cool Orly Kiely designer print.

I loved those old wellies so completely that I seriously considered trying to fix them with a tent repair kit (as you do) but somehow never got around to it.  So they sat at the bottom of a cupboard for the past few years while I searched for a suitable replacement.

Warm

Top of the agenda for a new pair, after the cost factor, was a neoprene lining. Why? Because, as with wetsuits, neoprene will keep your tootsies (and other extremities) warm and dry regardless of the weather. I'd discovered this as my old pair had a gorgeous orange neoprene lining. Mmmm, cozy, even in snow and ice.

Comfortable

The new pair had to be comfy too, without one of those silly and impractical heels, with a non slip sole and fit for purpose. Enter the Muck Boot.  I'd given serious thought to these a couple of years ago - yes, the search has been that long - but convinced myself these were for mucking out (makes sense, no?), i.e. the horsey brigade. But now several styles have been endorsed by the RHS which puts them firmly into gardening territory and very well they fit there too.

I was sent the ankle boots (the boots are also available with a taller leg) which are better for movement than my previous knee high rubber wellies; I'm tempted to buy a taller pair of Muck Boots for winter as the uppers are made of flexible neoprene and therefore fabulous for the walker's calves that I've been blessed with. As soon as I slipped them on I was won over.  Oooh, so comfy.  They have a shock absorbing inner sole, flex-foam insulation and breathable air mesh lining - which all adds up to all day comfort.  This has been a boon time and again since I've been known to garden for eight hours without a break, especially up at the allotment, and my feet were just as fresh and perky at the end of the day as at the start.

Lightweight

They're lightweight as well, something I'm grateful for when I've been on my feet for a while. In fact one day I forgot I was wearing them and went straight from the allotment to the supermarket. Hey, colour me stylish.

Speaking of which, during their recent tour of New Zealand, the media noticed that Meghan Markle and her husband, Prince Harry, both wore Muck Boots. Need I say more?

Reliably waterproof

I put the boots through their paces on a long country walk up in the Chiltern Hills, accessed by a very muddy bridle path.  In a dry summer this wouldn't have been a problem but it had been raining heavily the day before. In some places the only options were to slither up the bank or squelch through inches of wet mud. These are situations where the boots coped splendidly; yes, they were caked in sticky mud but my feet and, more importantly, socks were dry and I simply hosed the boots down at the end of the walk as they're entirely waterproof.

Self cleaning and non slip soles

The boots are marketed as having a 'self cleaning and high traction outsole'. The high traction I can attest to but I found that the claim to self-clean worked only in part. After a day digging on my enriched but clay-based soil, I felt the need to pop the boots into a bag for storage as there were remaining bits of mud embedded in the sole, even after a short walk home. Okay, so that was on days when I didn't rinse them at the end of the day - who does? In the time honoured tradition, I took them off at the door and left them there.

December 2021: I originally wrote this review in October 2016 and, just to let y'all know, they're still in daily use! Over the past five years, I've regularly gardened and walked in them in all weathers, and still find them comfy, waterproof and, as already mentioned ~ahem~ stylish. (Maybe not so much that last one.) They're still going strong - no signs of wearing out any time soon.  

And that's when having a fantastic boot scraper comes in handy!


I saw this tree the other day and thought it would make an excellent boot scraper; tiny problem, it's not near my home.


Luckily, I've since discovered a marvellous piece of kit for boot cleaning - simple and effective, I've been trying out the Mudbuster.  It's basically a one-size fits all footwell with plastic spikes - fill with water, stick your boot in, do a little dance around on the spot and the mat does the work of cleaning for you - sides as well as soles. Brilliant.  I wish I'd had this when my son was younger and played football every weekend; on the other hand, I think it could still be very useful for post-festival trainers (as well as gardening!).  Not for me, I hasten to add, but for my festival going son - you can see from this photo that one size fits all!


My thanks to the Original Muck Boot Company who gave me a pair of RHS Endorsed Muckster II ankle boots to review. They are available from the company's website here.

My thanks also to Pennine Manufacturing who kindly sent me a Mudbuster to try out. Mudbusters can be ordered direct from Pennine via the phone number on the website or email sseddon@pennineindustries.com  The unit retails at £10.99.
You Tube video of Mudbuster mats in action here.

9 Oct 2016

#UpandAutumn

... to borrow a hashtag phrase which I keep seeing on Twitter.  I love it, it's so appropriate, especially given the sunny weather we've had this week to start the season off.  There's nothing quite like blue skies to make me feel motivated and now is not the time to start slacking off in the garden. (I've done enough of that already this summer!)

Veg gatherings

There's bulbs to plant.  I have a large basket full waiting to be planted; alliums, daffodils, snowdrops and crocuses can go in now so that they have a chance to develop roots while the soil is still warm - that's particularly true of alliums - and I also have about 250 tulip bulbs which I'll plant next month when it's a bit colder. That's nowhere near the thousands of bulbs that are planted in public gardens but I know my limitations - kneeling pads, restorative yoga and Deep Heat at the ready.

Every year I add to the previous year's tulips; I never lift the bulbs when they've finished flowering but nip off the flowering stalk and wait for the leaves to die back. Most of the bulbs have proved reliably perennial so far - fingers crossed for this year as well, although realistically they'll be less vigorous year on year.  Bargains are a necessity as my work in the communal gardens here is not funded.  This year, I'm very taken with 'Sherbet' bulbs from Morrison's supermarket. I grew them last year and there were some absolute beauties in the mix. I paid £2 per bag of 12 which I think is quite good, even with no budget to speak of.

Another job waiting for my attention is the planting of several grasses in the middle garden. Remember that space?  Yep, big plans, not enough time. It's mostly been used as a holding/nursery area for plants this year while I flesh out a plan and watch how the light falls across the garden throughout the year.  As luck would have it, I collected a car load of plants from the T2 tea collaboration with Rich Landscapes last week and autumn is a good time to plant perennials.  I'm hoping to dedicate a large part of my weekend to weeding, planting and pruning; it's much needed.


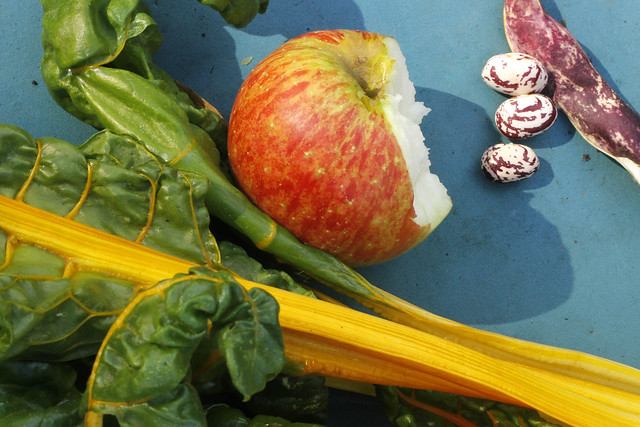
The veg patch is ticking over at the moment. Braeburn apples have ripened and are, amazingly (touch wood), still on the tree.  I usually pick one a day to munch on.  A few pears need to be picked and ripened indoors and, huge excitement, I've got five quinces ripening! This is a first and I'm really looking forward to cooking with those - or even just being able to smell the famous perfumed quince at last.

Borlotti beans have coloured up beautifully and are now an astonishingly vibrant red.  I don't know yet what they taste like as I'm saving any ripened pods until I have enough to cook with.  Likewise with the tomatoes.  Remember my despair a few weeks back? I needn't have panicked, I now have bowls of beautiful yellow plum shaped tomatoes - and no sign of blight.  I'm still going to choose my tomato seeds with better care next year though.  It's worth noting that Banana Legs (the yellow plum tomatoes) were prolific, each fruit 2 to 3 inches long and each plant growing several clusters of 5 to 6 fruits. I bought the seeds from Pennard Plants at one of the early RHS shows.

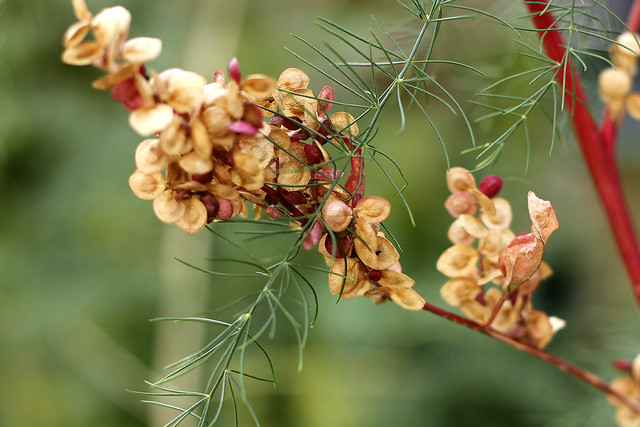
I've still got to plant out Cavolo and curly kale but it's a question of where? The patch is still stuffed with chard, beetroot (small leaves of both excellent in salads), broccoli, rhubarb and radishes that I'm letting flower so I can try the pods - supposedly a restaurant delicacy, don't you know!


orache + fennel
~Orache (Atriplex rubra) aka Mountain Spinach and Fennel - both self seed enthusiastically at this time. ~

And then there's seed saving ... and sowing for next year's annuals ... and mulching ... and, and, and. Onwards, always onwards.

Like I say, up and at 'em.

1 Oct 2016

Sweet peas all summer


I often forget to sow sweet peas, either completely or until it's rather too late but, last winter, I remembered.  In an exercise to rid my seedbox of outdated seeds, I came across a random selection of sweet pea seeds.  A few were odd seeds at the bottom of the packet, others were facing or past their best before date (not that that seems to matter much). With all these leftovers, I reckoned that I'd nothing to lose with a December sowing; after all, it wouldn't matter if they didn't germinate or grow as there would be time in the spring to sow again with fresh seed.

Contrary to my expectations, they did grow and I picked my first bunch for an Instagram photo on 5th June. All through June, July and August I enjoyed the heady evening scent of prolific sweet peas in the garden.  I couldn't believe that they would flower for 3 months from one sowing and I became determined that they'd still be flowering at the end of August.  That involved a lot of deadheading, let me tell you!

~ Mid July: Sweet peas and nasturtiums at one end of the veg patch garden ~

By the first week in September I was ready to let them finish their botanical journey and make seedpods so I stopped deadheading.  By mid-September I found a dried seed pod among the still blooming stems ... and today, the last day of September, I picked the last tiny bunch of flowers.  Four months of flowers! Incredible. (At least that's the way it seems to me.  Is this lengthy flowering usual?) I'd like to claim that it was my prowess as a gardener that achieved this (hohoho) but, realistically, I like to think anyone could do the same. There are a few key points however and this is what I did:

1.  Start your seedlings early. Sweet peas for next year can be sown at any time now and left in a sheltered place, eg, cold frame, greenhouse or cloche. Depending on your location and the weather, they may need additional protection if the winter is harsh and you're growing north of, say, Milton Keynes. (Mine survived last year's relatively mild winter on my balcony with no added protection. This year I think I'll put them in my friend's greenhouse.)

2. Sow into deep pots. I put 3 or 4 seeds into each 10cm diameter deep pot (deep root trainers are also ideal) and placed the pots on a shelf on my tiny sheltered balcony.  Amazingly, I had 80 - 100% germination in each pot and, bar a tiny amount of watering, largely left the seedlings to get on with it.

3.  Keep an eye on the plants. By February I needed to pinch out the tops to stop them getting leggy. My balcony is part shaded on three sides so the plants had a tendency to grow towards the light. Pinching out the tops above the first four sets of true leaves also helps the plants to bush out.


4. Plant out from mid-April (if possible). I had other distractions so mine went outside in early May.  I planted the seedlings without separating them to minimise root disturbance. At four to a pot that's not ideal but they had plenty of room to grow once planted; each cluster of seedlings was about 40cm from its neighbour.  I added a small amount of blood, fish and bone to the planting holes, mixed this in with the soil and bunged the whole potful of seedlings into the prepared hole.  Each plant was tied in to the prepared trellis and the row watered well.

5.  Water, water, water.  I made sure to prioritise watering the sweet peas so that the soil stayed moist. I also gave them a very occasional boost with some diluted home-made comfrey feed. And I tried to aim for the roots to keep the leaves dry. (The wet spring/summer helped as well, I'm sure.)

6.  Support and encourage. I tied them in as they grew (actually, it was my neighbour who helps who did that) and we both kept on top of regular deadheading and watering.  As soon as the each bloom started to fade, it were cut back to the base of its stem to encourage more flowers.

7. Label and save. As these plants did so well, I'm keen to save the seed for next year. The plants tended to twine around and through each other as they grew up the trellis. Stupidly, I didn't label the stems so, now that I'm saving the seed pods, I have no idea which sweet pea I'll get when I sow those seeds - it will be a nice surprise!

I had some beautiful variations in the flowers as the summer wore on and suspect this might be due to cross pollination.  Has anyone else found this?  In a one and a half metre row, I was growing purple/black, white, lavender, pale pink plus shades of bright pink and shades of purple (Chiltern Seeds 'Summer Sizzler' and 'Flamenco Mix', my favourites and sent to me by the very kind Flighty). I'm hoping that those variations will appear in next year's flowers because the challenge now is to sow the seeds that I've saved and see if I can create a repeat performance.

Update:  I forgot to mention that all but the very dark flowers had ridiculously long stems as well - so long that I got the tape measure out more than once - and the longest was 16" !!

How did everyone else do with their sweet peas this year? Did my plants do well or was this a universal trend? And who's started next year's annuals off already?  (I have to do mine this weekend!)

~ a few photos taken in August ~